
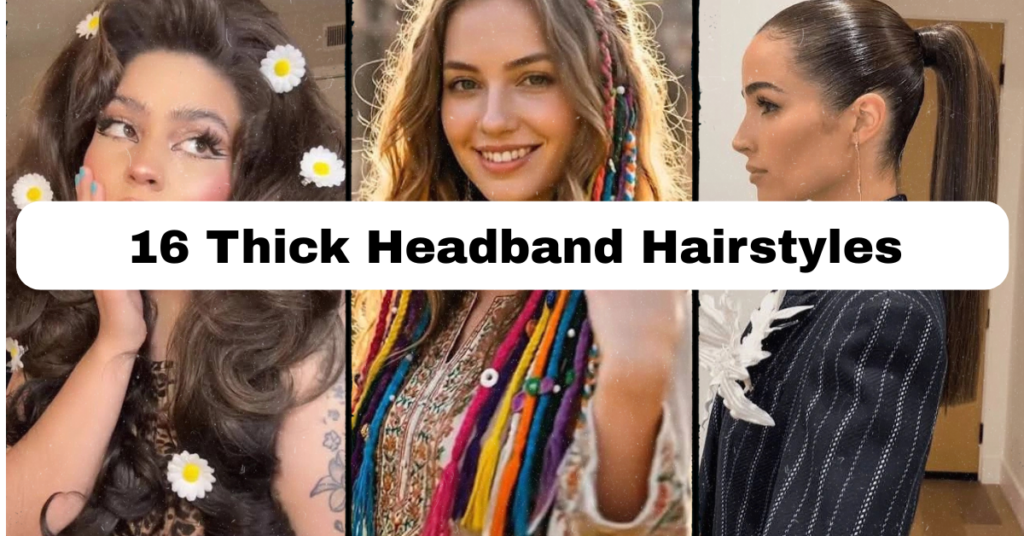
However, when you are seeking to put yourself together, there is no better way to save the day than using thick headband hairstyles for hiding the mess in your hair or transforming your whole appearance. Having worked more than a decade in the hair styling industry as a professional stylist, I have experimented with every conceivable hair accessory on different hair textures and lengths. Our team has researched, styled and perfected these techniques to help you achieve salon quality hairstyle on your own. Rest assured that the styling tips provided in this guide have been proven by years of salon experience and knowledge of healthy hair.
How do you style thick headband hairstyles? Thick headband hairstyles are created by putting an oversized and often padded or decorated band just behind your hairline or forehead and using it in loose styles, updos, braids or ponytails. This hair accessory suits all hair textures and helps add volume and accent to your hairstyle. The secret to success in styling this hair accessory is choosing the one which suits your face shape and is comfortable not causing any friction or headaches.
The Magic of the Wide Headband
Let’s talk about why wide headbands are an absolute game-changer for your wardrobe. I love these accessories because they are the ultimate fashion cheat code; they take practically zero effort but make it look like you spent hours sitting in a salon chair. Whether you are dealing with unwashed third-day hair, growing out unruly bangs, or just want to add a pop of color to a plain outfit, a thick band does the heavy lifting for you.
The beauty of this accessory is its sheer versatility. You can find them in rich velvets, breezy cottons, structured plastics, and jewel-encrusted silks, meaning there is a version for your morning jog, your corporate meeting, and your best friend’s wedding. It acts as both a functional tool to control volume and a bold statement piece that frames your face beautifully. Plus, unlike tiny bobby pins or tight hair ties that snap and pull, a properly fitted wide band distributes pressure evenly, keeping your hair healthy and dent-free.
16 Thick Headband Hairstyles to Try Today
Here is a breakdown of 16 incredible ways to style your hair with a wide band, complete with professional design approaches, implementation tips, and specific style Pairings.
The Retro Bouffant Volume

The Retro Bouffant Volume approach works beautifully because it utilizes the wide band as a structural barrier to accentuate height and drama at the crown of the head. This design relies on the fundamental principle of creating structural contrast, where the front of the hair is sleekly flattened by the band while the hair directly behind it is lifted. To achieve this successful look, you need a high-quality teasing brush, a flexible-hold volumizing hairspray, and a solid-colored velvet headband to anchor the texture.
- Implementation Tip: Section out a two-inch piece of hair at the crown, spray the roots with dry shampoo, and tease gently downward before smoothing the top layer over and sliding the band into place.
- Suitability: This style looks exceptionally stunning with vintage or traditional home aesthetics and retro-inspired fashion ensembles.
If you prefer a softer, more relaxed vibe, the next style offers a beautiful alternative.
The Boho Waves and Wide Fabric Band

The Boho Waves and Wide Fabric Band approach works because it embraces natural, lived-in texture while using a soft fabric band to channel an effortless, artistic energy. The fundamental principle here is balance; the relaxed, flowing waves prevent the thick fabric from looking bulky or overwhelming. For a successful outcome, utilize a 1.25-inch curling wand to create loose, alternating waves, and pair them with a lightweight cotton or linen wrap band.
- Implementation Tip: After curling your hair, let it cool completely before tugging the headband on, then use your fingers to gently pull a few face-framing tendrils out around your ears.
- Suitability: This casual approach seamlessly complements bohemian, modern-rustic, or coastal lifestyles.
To transition from a relaxed daytime look to something sleek and professional, let’s explore a sharper alternative.
The Sleek High Ponytail Anchor

The Sleek High Ponytail Anchor design works perfectly because it transforms a standard sporty look into an architectural fashion statement. The main principle behind this design is geometric tension, where the clean lines of the pulled-back hair mirror the smooth arc of the thick accessory. To execute this look flawlessly, use a boar bristle smoothing brush, a lightweight high-shine gel, a heavy-duty elastic tie, and a structured satin or leather padded band.
- Implementation Tip: Secure your ponytail at the crown first using your gel and brush, then slide the headband backward from your forehead, stopping exactly one inch before the ponytail base.
- Suitability: This sharp look fits beautifully into minimalist, ultra-modern, and high-fashion urban lifestyles.
If a high ponytail feels a bit too intense, a lower, softer placement might be exactly what you need.
The Low Messy Chignon Frame

The Low Messy Chignon Frame approach works brilliantly because it balances an effortless, undone bun with a structured frame that keeps the look intentional rather than sloppy. This design leans heavily on the principle of casual elegance, combining a relaxed, twisted low knot with a bold, defining accessory. You will need a handful of secure U-shaped hairpins, a texturizing sea salt spray, and a thick braided or knotted fabric headband.
- Implementation Tip: Twist your hair into a loose bun at the nape of your neck, pin it securely, and then place the headband on top, allowing your natural hair parting to show slightly underneath the band.
- Suitability: This romantic style transitions effortlessly from traditional settings to modern chic environments.
For those days when you want your natural hair texture to take center stage, consider this next method.
The Natural Curls Pop

The Natural Curls Pop design works amazingly because it celebrates maximum volume and natural coil patterns while keeping curls out of your eyes. The core concept is volume definition, using the headband to compress the hair at the roots, which causes the rest of the curls to cascade outwards dramatically like a crown. For the best results, use a leave-in conditioner cream, a lightweight curl-defining gel, and a smooth, friction-free silk or satin-lined thick headband.
- Implementation Tip: Apply your styling cream to damp curls, allow them to air dry or diffuse completely, then push the band from the front hairline backward about two inches to create a beautiful lift.
- Suitability: This magnificent, texture-rich look pairs wonderfully with contemporary, vibrant, and artistic style preferences.
If you are working with shorter strands, you can still easily rock this look with the following technique.
The Short Pixie Edgy Lift

The Short Pixie Edgy Lift works exceptionally well because it breaks up the uniformity of short hair cuts and adds an instant element of playful asymmetry. The underlying principle is textural contrast, contrasting the short, piecey layers of a pixie cut with a thick, structured accessory. To pull this off, you will need a matte styling wax or pomade, a fine-tooth comb, and a relatively flat, non-padded wide band made of textured fabric or leather.
- Implementation Tip: Warm a dime-sized amount of styling wax between your fingers, piece out the top sections of your pixie cut to create height, and place the band directly behind your bangs or front layers.
- Suitability: This bold look pairs wonderfully with modern, industrial, and avant-garde fashion aesthetics.
If you want to keep your hair down but need a clean, polished finish, a classic middle part is the way to go.
The Center-Parted Sleek Down-Do

The Center-Parted Sleek Down-Do works because it offers a symmetrical, ultra-polished framing for the face that feels deeply sophisticated. The fundamental principle is perfect symmetry, where the hair is divided down the middle and flattened securely behind the ears by the weight of the wide band. You will want to use a ceramic flat iron, a premium shine-enhancing serum, a rat-tail comb for a precise part, and a thick, jewel-encrusted or pearl-embellished padded headband.
- Implementation Tip: Create a razor-sharp center part while your hair is damp, blow-dry flat, flat-iron the lengths, and lower the headband straight down onto the head without pushing it backward to keep the part pristine.
- Suitability: This glamorous look is ideal for formal occasions, traditional settings, or upscale modern lifestyles.
Let’s shift from a sleek, straight look to one that embraces intricate, woven details.
The Milkmaid Braid Accent

The Milkmaid Braid Accent design works beautifully because it merges historical, romantic braid patterns with modern accessory placement for a whimsical, fairytale effect. The core principle here is nesting, where the thick headband rests snugly parallel to your wrapped braids, creating a rich, layered crown appearance. To create this look, you need clear elastic bands, a few matte bobby pins that match your hair color, a light-hold hairspray, and a matching braided faux-hair or velvet thick headband.
- Implementation Tip: Divide your hair into two low pigtails, braid them to the ends, wrap them over the top of your head like a tiara, pin them down, and slide your headband right up against the braids.
- Suitability: This highly detailed style is a perfect match for cottagecore, rustic, and romantic traditional aesthetics.
For an option that feels a bit more playful and youthful, consider splitting your volume into two.
The Double Space Bun Balance
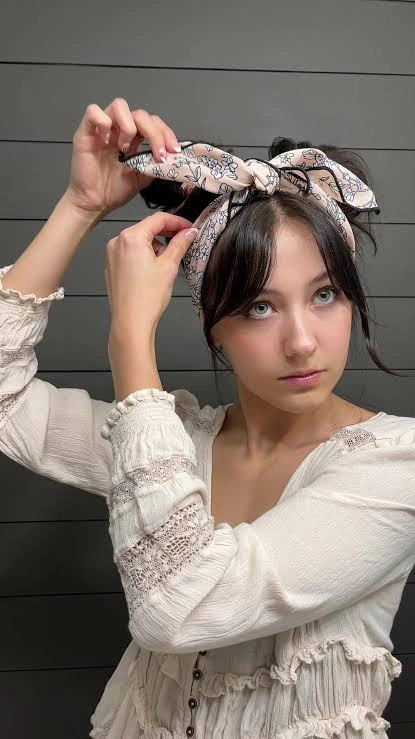
The Double Space Bun Balance design works brilliantly because it splits hair volume symmetrically, creating a fun, youthful silhouette that is framed by a thick accessory. The principle behind this look is playful geometry, utilizing the headband to ground the two high buns so the style looks cohesive rather than erratic. For this setup, gather two large scrunchies, several heavy-duty bobby pins, a smoothing brush, and a wide, brightly colored or patterned fabric headband.
- Implementation Tip: Create your two high buns on either side of your crown first, ensuring they are symmetrical, then carefully stretch your elastic fabric headband over the front of your head to sit right before the buns.
- Suitability: This energetic style is well-suited for modern, eclectic, and casual weekend wear.
If you want a look that scream old-school Hollywood luxury, the next style is your perfect match.
The Vintage Hollywood Side-Sweep

The Vintage Hollywood Side-Sweep works gorgeously because it directs all hair volume to one side of the face, creating an alluring, asymmetrical frame. The primary principle is directional flow, using the headband to lock down one side of the hair completely while allowing the other side to cascade over the shoulder in soft waves. You will need a large-barrel curling iron, creaseless setting clips, a flexible-hold gloss spray, and a thick, structured padded satin headband.
- Implementation Tip: Deeply part your hair on one side, curl all sections in the same direction toward your face, brush them out into a uniform wave, and place the band so it holds down the shallow side of your part.
- Suitability: This timeless look fits seamlessly into classic, traditional, and upscale glamorous lifestyles.
To achieve an active, effortless look that takes less than two minutes, try this functional option.
The Half-Up Top Knot Extension

The Half-Up Top Knot Extension works because it gives you the best of both worlds: the length of a down-do and the convenience of an updo. The core concept is vertical elongation, using the top knot and the thick headband together to draw the eye upward and add height to your silhouette. For this look, secure a small elastic hair tie, some texturizing powder, and a thick, flexible tortoiseshell or plastic wide headband.
- Implementation Tip: Section off the top third of your hair from the ears up, twist it into a messy knot on top of your head, secure it, and place the headband directly in front of the knot.
- Suitability: This versatile everyday style looks wonderful in modern, Scandinavian-minimalist, or casual suburban environments.
When you are short on time but need to look incredibly polished, a low-slung braid is an excellent choice.
The Loose Side Braid Anchor

The Loose Side Braid Anchor design works perfectly because it combines a soft, relaxed weaving technique with a solid, structured headpiece for a balanced look. The guiding principle is contrasting textures, matching a loose, pancaked three-strand braid with a smooth, solid accessory. You will want a small clear elastic band, a volumizing powder texture dust, and a thick matte leather or suede headband.
- Implementation Tip: Pull all your hair to one side, braid it loosely, secure the end, gently pull at the edges of the braid to widen it, and finish by slipping on your headband.
- Suitability: This charming, low-maintenance look pairs beautifully with bohemian, farmhouse, and casual traditional styles.
If you love the look of bangs but want to change how they frame your face, try this next styling secret.
The Curtain Bangs Framework
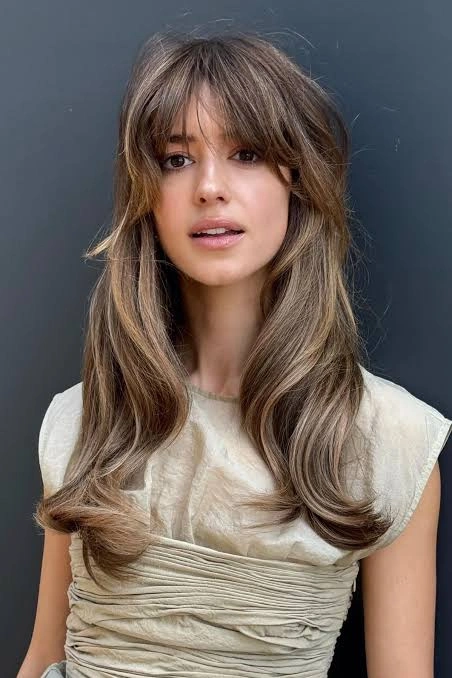
The Curtain Bangs Framework works beautifully because it highlights middle-parted face-framing fringe while keeping the longer rest of your hair neatly controlled. The principal concept is framing, utilizing the wide headband as a backdrop that pushes the long hair back while letting your curtain bangs swoop out to the sides. To style this, use a round blow-drying brush, a lightweight anti-frizz serum, and a wide fabric-covered comfort band.
- Implementation Tip: Blow-dry your curtain bangs forward and away from your face with a round brush, then slide the headband on directly behind the bangs so they fall naturally around your cheekbones.
- Suitability: This highly flattering style suits modern, classic, and professional office environments alike.
For an athletic or street-style vibe that keeps you looking cool and feeling comfortable, consider the full wrap.
The Sporty Jersey Wrap
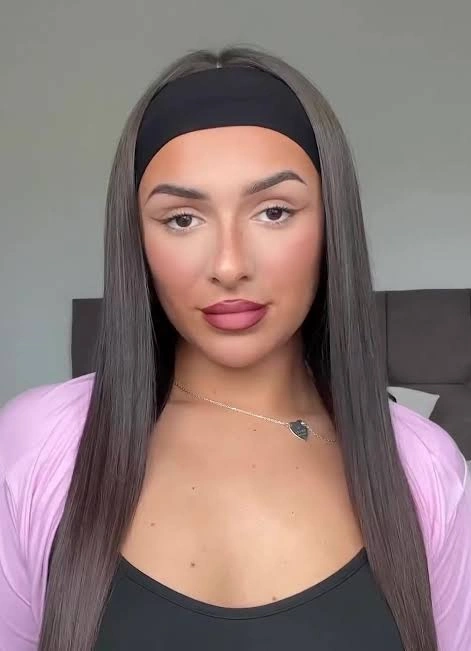
The Sporty Jersey Wrap works excellently because it prioritizes maximum function and moisture absorption without sacrificing clean aesthetic lines. The fundamental principle is sleek containment, using a wide, stretchy knit fabric to completely cover the hairline and ears for a streamlined look. You will need a high-quality dry shampoo, a wide elastic jersey-knit headband, and a leave-in hair protectant spray.
- Implementation Tip: Spray your roots with dry shampoo for grip, pull the jersey band entirely down around your neck like a necklace, and then pull the front edge up over your face to sit low on your forehead.
- Suitability: This highly functional approach is perfect for modern, active, athleisure, and minimalist lifestyles.
If your hair is incredibly thick and difficult to pin down, a layered tier look can solve your styling frustrations.
The Multi-Layered Tier Illusion

The Multi-Layered Tier Illusion design works wonderfully because it breaks up immense hair volume into manageable, visually interesting horizontal sections. The core principle behind this design is geometric tiering, using a very wide band to create a distinct separation between your smooth front hairline and a high-volume rear section. To manage this, utilize a firm-hold hair wax stick, a dense bristle smoothing brush, and an extra-wide three-inch soft fabric wrap band.
- Implementation Tip: Apply the wax stick to your front hairline, brush it back until it lies completely flat, tie the extra-wide band tightly over that section, and allow the back hair to puff out freely.
- Suitability: This high-volume style is exceptionally well-suited for bold, eclectic, modern, and artistic home and fashion styles.
Finally, let’s explore a classic, preppy look that never goes out of fashion.
The Deep-Side Part Preppy Polish
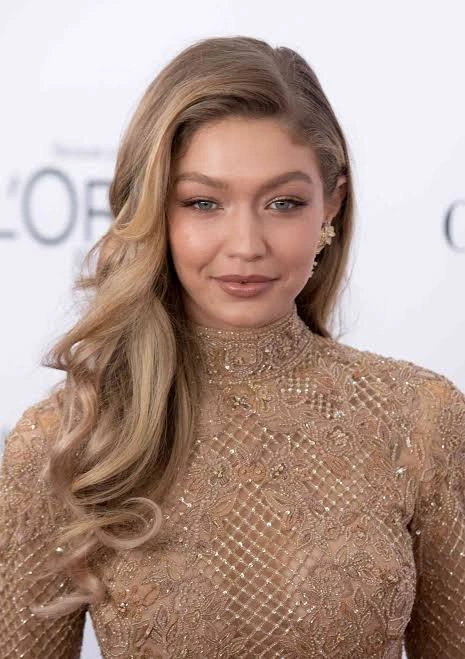
The Deep-Side Part Preppy Polish approach works beautifully because it references classic Ivy League style while giving an immediate lifting effect to your facial features. The fundamental principle is clean lines, utilizing a deep side part to create a sweeping asymmetry that is neatly held in place by a structured band. For this final look, you need a fine-tooth styling comb, a light holding mist, and a classic plaid, gingham, or grosgrain ribbon thick headband.
- Implementation Tip: Use your comb to draw a deep part starting directly above the arch of your eyebrow, comb the hair flat across your brow, and anchor it securely with the headband placed two inches back.
- Suitability: This sophisticated, clean-cut look matches perfectly with traditional, transitional, and classic preppy aesthetics.
Thick Headband Style Comparison Matrix
| Hairstyle Name | Best Hair Texture | Ideal Headband Material | Vibe / Occasion | Difficulty Level |
| Retro Bouffant | Straight to Wavy | Velvet or Padded Satin | Retro / Evening Event | Medium |
| Boho Waves | Wavy to Curly | Cotton, Linen, Knit | Casual / Festival | Easy |
| Sleek High Pony | Straight / Blow-dried | Structured Padded Leather | Modern / Edgy / Night Out | Medium |
| Low Messy Chignon | All Textures | Knotted Fabric or Suede | Romantic / Casual Chic | Easy |
| Natural Curls Pop | Coily, Curly, Kinky | Silk or Satin-Lined Fabric | Vibrant / Everyday Wear | Easy |
| Short Pixie Lift | Short / Straight / Wavy | Thin-Profile Wide Suede | Edgy / Modern Urban | Easy |
| Center-Parted Sleek | Straight | Jewel/Pearl Embellished | Glamorous / Formal | Medium |
| Milkmaid Braid | Medium to Thick Hair | Faux-Hair or Soft Velvet | Whimsical / Festive | Hard |
| Double Space Buns | All Textures | Bright Printed Cotton | Playful / Youthful Weekend | Medium |
| Hollywood Side-Sweep | Fine to Thick Wavy | High-Gloss Padded Satin | Classic Glamour / Wedding | Hard |
| Half-Up Top Knot | Wavy, Curly, Straight | Flexible Tortoiseshell | Minimalist / Everyday | Easy |
| Loose Side Braid | Medium to Thick Long Hair | Matte Suede or Leather | Farmhouse / Relaxed | Easy |
| Curtain Bangs Frame | Straight to Wavy | Wide Soft Fabric Comfort Band | Professional / Workplace | Easy |
| Sporty Jersey Wrap | All Textures | Stretchy Jersey Knit | Active / Athleisure | Easy |
| Multi-Layered Tier | Thick / Coily / Voluminous | Extra-Wide 3-Inch Wrap | Bold / Artistic Expression | Medium |
| Deep-Side Part | Straight to Smooth Wavy | Plaid or Ribbon Grosgrain | Preppy / Classic Sophistication | Easy |
Common Mistakes and How to Avoid Them
When styling thick headband hairstyles, it is incredibly easy to make a few simple missteps that can ruin your look or leave you with a massive headache by lunchtime. Here are the most common pitfalls I see as a stylist, along with easy ways to bypass them.
Mistake 1: Placing the Band Too Far Forward
- The Problem: Shoving the headband right onto your forehead or directly at your front hairline can flatten your face shape and make your hair look compressed or unnatural.
- The Solution: Always place the band at least one to two inches back from your actual front hairline. This positioning allows your natural hair growth direction to show, creating a much more flattering frame for your face.
Mistake 2: Ignoring Headband Friction and Tension
- The Problem: Choosing heavy bands with rough, exposed plastic teeth or rigid metal interiors that dig into the bone behind your ears. This causes friction, hair breakage, and tension headaches.
- The Solution: Opt for bands that feature padded ends, fabric wrapped tips, or flexible elastic bases. If a band feels tight the moment you put it on, gently stretch it over a stack of books overnight to widen the base before wearing it.
Mistake 3: Forgetting to Create a Hair Grip Anchor
- The Problem: Smooth, freshly washed hair often lacks friction, causing your wide headband to slowly slide forward or pop off the back of your head throughout the day.
- The Solution: Before putting your band on, lightly spray the area behind your ears and the crown of your head with a texturizing spray or dry shampoo. This gives the fabric something to grip onto, locking it firmly in place.
Similar Variations of the Trend
If you love wide headbands but want to diversify your accessory collection, there are several highly relevant variations that offer a similar look with slightly different styling rules.
[Wide Hair Accessories Collection]
       │
       ├─► Padded Alice Bands (Structured, regal, high vertical lift)
       ├─► Turban-Style Wraps (Soft fabric, center knot, full head coverage)
       └─► Elastic Bandana Scarves (Triangular, retro bohemian, lightweight)
Definition List of Related Accessories
Padded Alice Bands
A structured, horseshoe-shaped headband that features thick internal foam or padding, elevating it significantly off the skull to create a regal, crown-like height.
Turban-Style Wraps
A wide, completely circular fabric head wrap that features a distinctive twisted or interlocking knot structure directly at the top center, offering full hairline coverage.
Elastic Bandana Scarves
A triangular or wide strip of lightweight fabric equipped with an elastic band at the nape of the neck, mimicking a hand-tied handkerchief look without the hassle of knotting.
Hair Care Tips for Headband Wearers
Maintaining the health of your strands while regularly rocking these styles is essential for preventing long-term damage and thinning around your face.
- Switch Up Your Placement Routinely: Never place your headband in the exact same spot day after day. Shifting it slightly forward or backward prevents chronic friction on one specific section of hair follicles.
- Prioritize Satin and Silk Linings: Whenever possible, buy headbands that are lined with smooth satin or silk on the interior surface. Rough cotton, polyester, or plastic teeth can saw away at your hair cuticles, leading to frizz and breakage.
- Clean Your Hair Accessories Weekly: Your headbands absorb sweat, natural scalp oils, and styling products. Wash fabric bands by hand with a gentle shampoo to prevent bacteria buildup, which can cause skin breakouts along your hairline.
- Give Your Scalp Regular Breaks: Avoid wearing tight, thick bands for more than eight hours at a time. Let your hair rest completely down or in a loose satin scrunchie in the evenings to restore healthy blood circulation to your scalp.
Using these simple protective steps ensures your hair stays thick, lush, and undamaged. Experimenting with different textures and placements allows you to unlock the full potential of your favorite thick headband hairstyles.
Wrapping Up Your Styling Journey
Mastering these looks is all about embracing your unique hair texture and matching it with the right structural accessory. Whether you opt for a sleek, high-shine ponytail anchor or a relaxed, bohemian fabric wrap, these versatile pieces allow you to showcase your personal style with minimal daily effort. Remember that hair fashion should always be fun, functional, and gentle on your strands. Now that you have the ultimate blueprint, grab your favorite bands and start creating your own stunning thick headband hairstyles!