
Ever wonder how to style your curls into perfect curly bun hairstyles without ending up with a frizzy, tangled mess? As experienced hair stylists who have spent over a decade working with everything from loose waves to tight coils, we know exactly what it takes to manage textured hair. Our team has tested hundreds of pins, gels, and techniques to bring you the most accurate, salon-tested methods for styling your beautiful hair.
How do you style curly bun hairstyles? Curly bun hairstyles are created by gathering naturally textured or curled hair into a secured knot, wrap, or puff at various positions on the head. Successful execution requires prepping the hair with leave-in moisturizers or curl creams to maintain definition, minimizing frizz with microfiber towels, and securing the structure using hair bungee bands or u-shaped pins instead of tight elastics that crush curl patterns. The specific look varies from loose, romantic low buns to structured high top knots based on the placement and tightness of the wrap.
If you are tired of your curls flattening out or your bobby pins snapping mid-day, you are in the right place. Read on to discover the exact step-by-step methods and secret stylist tricks that will keep your updos secure and beautiful all day long.
Finding Your Perfect Curly Updo
Let’s chat for a minute about why we all love a good updo. Curls have a mind of their own, right? Some days they cooperate, and other days they just want to do their own thing. That is where the magic of a bun comes in. It is not just a lazy day backup plan anymore. A proper textured bun is a total power move for your style.
When you learn how to work with your curl pattern instead of fighting it, styling becomes incredibly fun. The secret lies in understanding your specific hair texture. Loose waves need lightweight products to keep from falling flat, while dense coils crave rich creams to hold their shape and shine. We are going to dive into exactly how to balance your hair’s unique needs with gorgeous visual designs.
Key Curly Bun Styles and Specs
| Bun Style | Best Hair Type | Hold Level Required | Ideal Occasion | Key Styling Tool |
| Messy High Bun | Types 3A to 4C | Medium | Casual / Daily | Hair Bungee |
| Sleek Low Bun | Types 2A to 3C | High | Formal / Work | Boar Bristle Brush |
| Space Puffs | Types 3C to 4C | Medium | Festivals / Outings | Wide-Tooth Comb |
| Braided Top Knot | Types 2C to 4A | Very High | Weddings / Parties | U-shaped Pins |
| Messy Pineapple | Types 3A to 4C | Light | Lounging / Sleep | Silk Scrunchie |
1. The Classic Messy High Bun
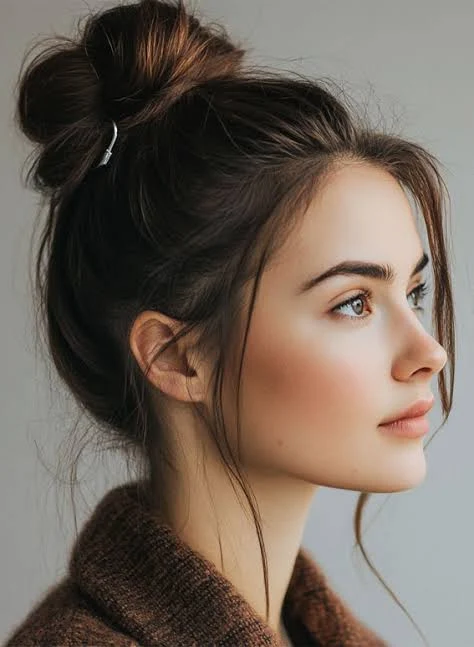
The classic messy high bun proves that casual styling can still look incredibly chic and intentional on textured hair. This design approach works beautifully because it celebrates natural volume instead of trying to smooth it down into submission. Instead of fighting gravity, you are using the natural spring of your curls to create height and drama at the crown of your head.
To pull this off, you want to avoid heavy gels that make your roots look crunchy or wet. Instead, opt for a lightweight curl-refreshing spray to wake up your tendrils. Flip your head upside down and gather your hair gently at the absolute crown. Do not pull too tight; let the sides remain soft and slightly loose. Wrap a thick, seamless hair tie around the base just twice.
Pro-Tip: Gently pull a few delicate curls loose around your hairline and ears before tightening the bun. This frames your face and makes the entire look feel effortless rather than rushed.
This specific hairstyle works wonderfully for casual outings, gym sessions, or weekend brunches. It transitions beautifully into bohemian or modern home environments where relaxed, natural aesthetics are celebrated.
2. The Sleek Low Chignon
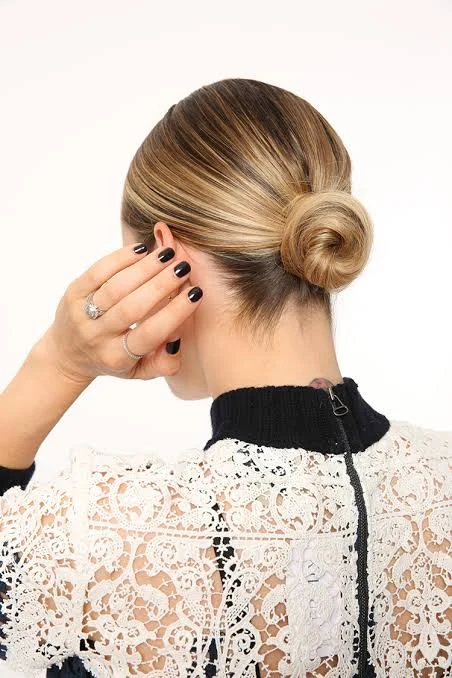
The sleek low chignon offers a striking contrast by combining a smooth, polished crown with a burst of texture at the nape. This design approach works because it brings instant sophistication and balance to wilder curl patterns. By taming the top section, you create a clean frame for your face while letting the bun itself showcase your natural coil pattern.
To achieve this look, you will need a high-quality edge control or a firm-hold styling gel. Apply the product generously to your roots, then use a boar bristle brush to smooth your hair backward toward the nape of your neck. Secure the hair into a tight, low ponytail. Next, twist your curls loosely into a circular shape, tucking the ends under and pinning them down with sturdy U-shaped hairpins.
[Sleek, Smooth Crown] ---> [Secured Nape Ponytail] ---> [Twisted Textured Bun]
This style creates a highly professional, elegant atmosphere that solves the challenge of wearing natural curls to formal corporate events or black-tie parties. It pairs flawlessly with traditional, minimalist, or highly modern wardrobe styles.
3. Double Space Puffs
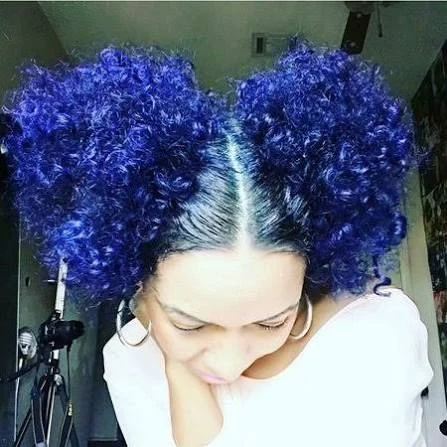
Double space puffs are a playful, high-energy hairstyle that perfectly showcases the incredible bounce and volume of tight coils. This approach works because it distributes hair weight evenly across two sections, preventing sagging while making a bold fashion statement. It turns your natural volume into a fun, symmetrical architectural feature.
Start by splitting your hair cleanly down the middle from your forehead to the nape of your neck using a rat-tail comb. Work on one side at a time, applying a moisturizing leave-in conditioner to keep the hair pliable. Gather the right section high on top of your head and secure it with a soft scrunchie, allowing the curls to puff out freely. Repeat the exact same steps on the left side.
- Key Elements: Center parting, high bilateral placement, maximum fluffing.
- Best Product: Water-based moisturizing mist.
- Vibe: Retro-modern, festival-ready, playful.
This style looks absolutely amazing on individuals with Type 3C to 4C hair. It brings a fresh, youthful energy that shines in casual settings and streetwear fashion cultures.
4. The Braided Top Knot
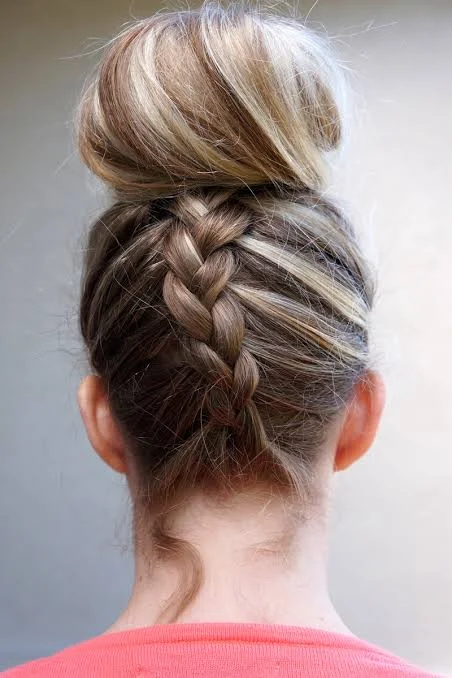
The braided top knot blends protective styling with elegant updo design for a look that lasts for days. This approach works brilliantly because the braided elements add internal structure to the bun, keeping thick hair secure without needing dozens of heavy metal pins. It offers a beautiful pattern contrast between the braided base and the crown.
To build this look, gather your hair into a high ponytail. Divide the ponytail into three equal sections and create a standard three-strand braid all the way to the ends. Secure the end with a small elastic. Now, wrap that braid around the base of your ponytail, keeping the flat side of the braid facing outward so the pattern is visible. Pin the ends securely underneath.
Pro-Tip: Spray the finished knot with a light gloss or sheen spray. This highlights the intricate patterns of the braid and makes your hair look radiant under any lighting.
This look is a lifesaver for outdoor weddings, hot summer days, or formal galas. It handles humidity like a dream, making it perfect for tropical climates or beachside events.
5. The Messy Pineapple Bun
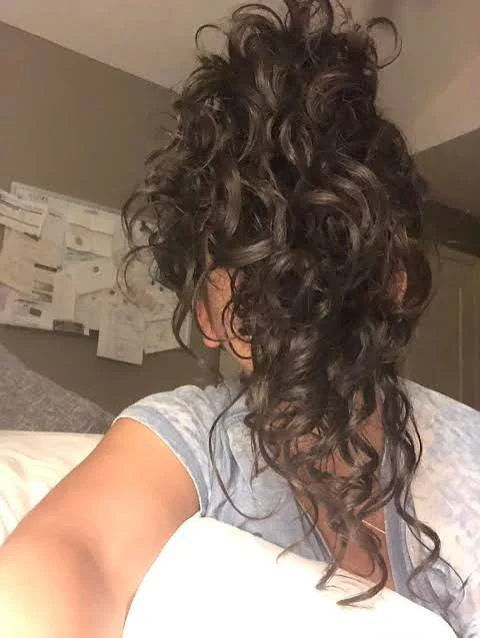
The messy pineapple bun is the ultimate fusion of nighttime hair protection and daytime casual styling. This design approach works because it gathers all your curls at the very front of your crown, preventing them from being crushed when you lean back or relax. It keeps your curl pattern completely intact while looking effortlessly stylish.
To create this look, flip your hair forward and gather it right near your forehead. Use a silk or satin scrunchie to secure the hair, looping it through only once or twice so it remains very loose. Let your curls cascade forward over your face like the leaves of a pineapple. Do not worry about stray hairs at the back of your neck; let them hang naturally.
- Material Choice: Always use silk or satin scrunchies to eliminate friction and hair breakage.
- Placement: Position the base within two inches of your front hairline.
- Maintenance: Spritz the loose canopy with water to bounce the curls back up in the morning.
This functional style is perfect for lounging around the house, running quick errands, or protecting your curls while sleeping. It fits right into a cozy, minimalist lifestyle.
6. Romantic Side Bun with Tendrils
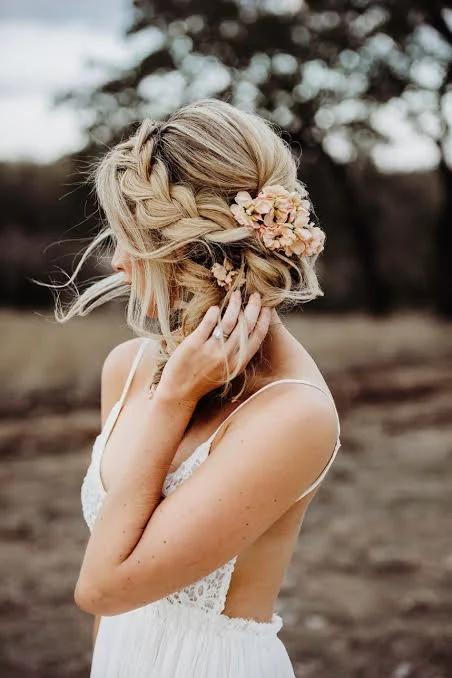
The romantic side bun with tendrils introduces asymmetry to your look, creating a soft and whimsical aesthetic. This approach works beautifully because it softens strong jawlines and draws attention directly to your eyes and lips. It feels inherently poetic and relaxed, making it a favorite for special occasions.
Create a deep side part on your preferred side. Gather your hair loosely behind the opposite ear, keeping the tension very relaxed. Twirl your hair into a loose, flat cinnamon-roll shape and secure it using flexible hair pins. Once the bun is set, use your fingers to gently tug small strands of hair from your temples and behind your ears.
[Deep Side Part] ---> [Asymmetrical Low Gathering] ---> [Soft Loose Pinning]
This design creates a deeply romantic, vintage-inspired atmosphere. It pairs beautifully with cottagecore, bohemian, or classic vintage fashion styles, and is highly popular for bridesmaid hairstyles.
7. Half-Up Top Knot
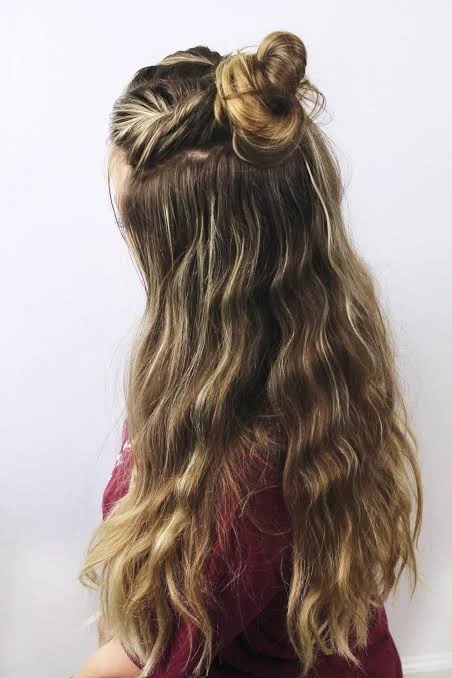
The half-up top knot gives you the absolute best of both worlds by letting you show off your length while keeping hair out of your eyes. This approach works because it reduces the overall volume around your face while maintaining a beautiful frame of curls bouncing around your shoulders. It strikes an ideal balance between structured and free-flowing.
Section off the top portion of your hair, starting from the arches of your eyebrows up to your crown. Secure this top section into a mini high ponytail, then wrap it tightly into a small, neat top knot. Leave the bottom half of your hair completely free to cascade down your back. Apply a small amount of curl defining gel to the loose hair to boost definition.
Pro-Tip: If your bottom curls look flat, use a diffuser attachment on your blow dryer for three minutes to pump up the volume of the loose hair.
This versatile style is fantastic for creative workspaces, school, or casual dates. It works wonderfully across all home and personal styles, from modern minimalist to eclectic bohemian.
8. The Faux Bang Bun
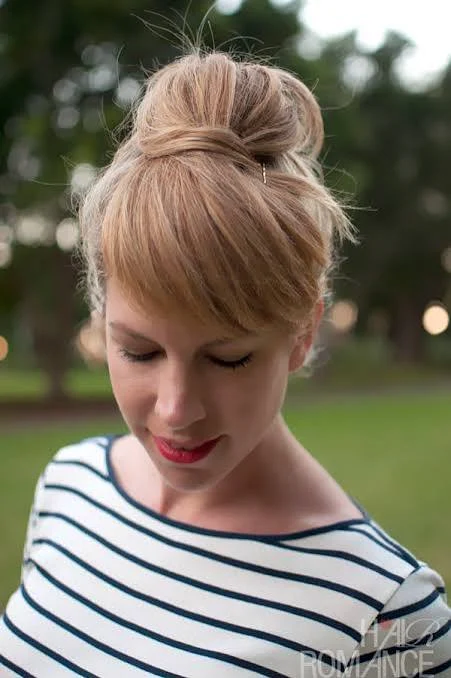
The faux bang bun lets you experiment with the look of full fringe without ever touching a pair of scissors. This design approach works by utilizing the long ends of your own curls to drape forward over your forehead, mimicking the look of thick, textured bangs. It is a fantastic way to completely change your face shape for a day.
Gather your hair into a very high ponytail right at the front of your crown. When you wrap the hair tie for the final time, pull your hair only halfway through to create a loop. Direct the remaining long ends of your hair forward over your forehead. Arrange the curls with your fingers so they sit like bangs, and use a couple of bobby pins to hold the loop steady behind them.
- Bang Prep: Define the forward-facing curl tips with a touch of lightweight pomade.
- Volume Check: Fluff the main loop to ensure it looks balanced with the new fringe.
- Secure Hold: Pin the sides of the loop close to the scalp so it doesn’t wobble.
This creative style brings a bold, artistic atmosphere to your look. It is perfect for fashion-forward events, concerts, or whenever you want to shock your friends with a temporary hair transformation.
9. Scarf-Wrapped High Bun
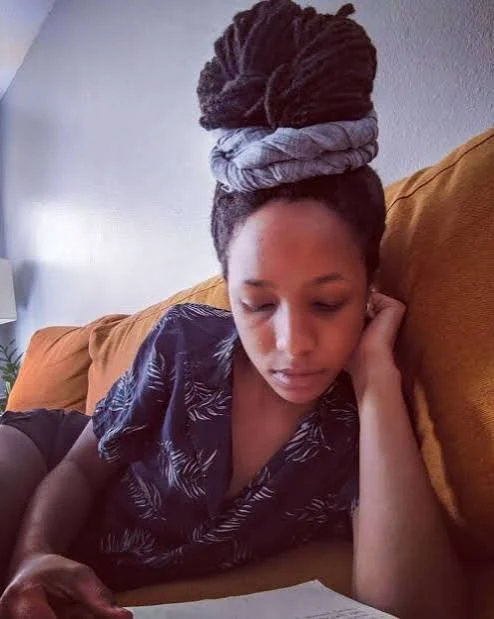
The scarf-wrapped high bun injects vibrant color, pattern, and texture directly into your hairstyle while acting as a protective barrier. This approach works because the silk or satin fabric reduces moisture loss from your strands while adding instant visual interest. It can turn a simple, messy bun into a coordinated accessory masterpiece.
First, pile your curls into a standard high bun. Take a square silk scarf, fold it diagonally into a long band, and place the center of the scarf against the back of your head. Bring the ends forward around the base of the bun, cross them over at the front, and tie a neat knot at the back. Tuck any remaining loose fabric ends under the wrap.
[Base High Bun] ---> [Wrap Scarf From Back to Front] ---> [Tie and Tuck Ends]
This style creates a chic, globally-inspired, or retro atmosphere. It is an amazing solution for third-day hair when your roots need coverage but you still want to look completely put together.
10. The Triple Bun Mohawk
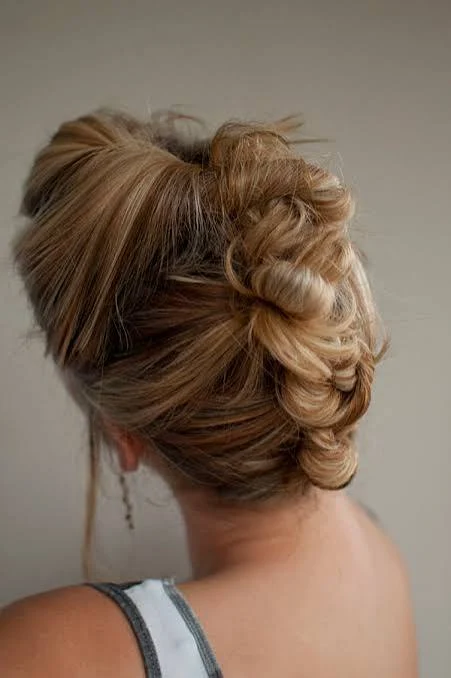
The triple bun mohawk (also known as Bantu-inspired rows) is an edgy, high-impact look that distributes thick hair into beautiful architectural segments. This design approach works because it tames immense volume into a controlled, linear path down the center of your head. It creates a powerful silhouette while keeping your neck completely cool.
Divide your hair horizontally into three equal sections: one at the top, one in the middle, and one at the bottom. Secure each section into a neat ponytail along the center line of your head. Twist each ponytail tightly around its own base to create three distinct, touching buns. Secure each one firmly with pins.
Pro-Tip: Keep the parts between the sections perfectly straight using a small amount of pomade on your comb to create a high-end, clean finish.
This style brings an edgy, modern, and confident atmosphere. It is incredible for concerts, fashion shows, or artistic gallery openings where you want your hair to stand out as a piece of art.
11. The Twisted Low Bun Row
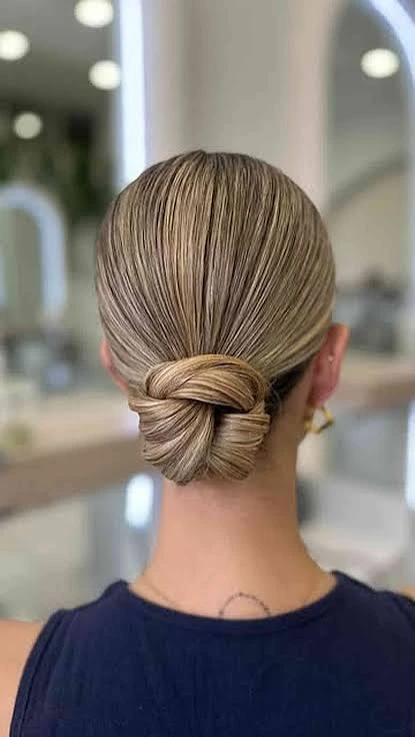
The twisted low bun row takes the concept of a classic low bun and multiplies its elegance by incorporating delicate twists along the scalp. This design approach works because the side twists guide the eye naturally toward the back, adding depth and visual complexity to the profile view of your updo.
Separate two small sections of hair near your front hairline on either side of your part. As you bring your hair back into a low ponytail, twist these side sections backward, adding hair to them as you move along the scalp (like a French twist). Incorporate the ends of these twists into your low ponytail, then roll the entire bundle into a wide, flat bun at your nape.
- Twist Tension: Keep the twists firm but not tight enough to pull on your scalp.
- Pinning Technique: Insert bobby pins directly through the center of the twists to hide them.
- Finishing Spray: Use a flexible-hold hairspray to keep flyaways smoothed along the twists.
This style delivers a highly polished, romantic aesthetic. It is a fantastic choice for professional settings, job interviews, or elegant dinners.
12. The Voluminous Donut Bun
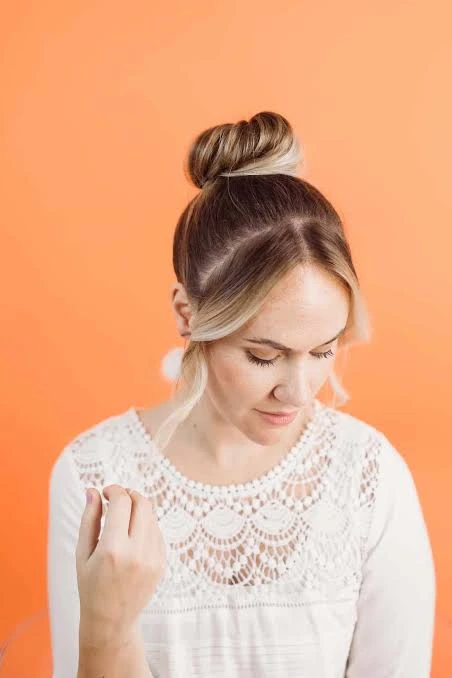
The voluminous donut bun leverages structural styling inserts to give finer or looser curl patterns the appearance of immense density and weight. This approach works because it provides a solid internal foundation for your hair to drape over, ensuring your bun looks perfectly symmetrical and round from every single angle.
Slide a mesh hair donut over a secure mid-height ponytail. Tilt your head forward and spread your curls evenly over the mesh insert so that it is completely hidden. Slip a thin elastic band over the hair and donut to lock the shape in place. Take the remaining hair ends, wrap them around the base of the donut, and pin them down securely.
[Ponytail Base] ---> [Slide Mesh Donut On] ---> [Spread Curls & Elastic Wrap]
This style creates a clean, classic, ballet-inspired atmosphere. It works beautifully for formal performances, dance classes, or traditional formal events where neatness is paramount.
13. The Goddess Braided Bun
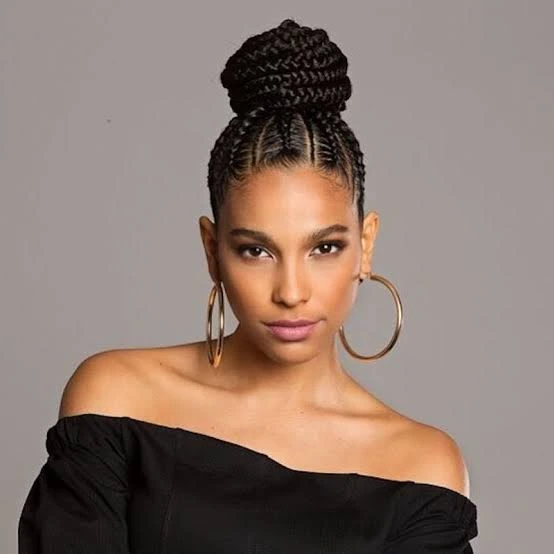
The goddess braided bun incorporates thick, chunky cornrows or flat braids that feed directly into a massive, regal bun. This design approach works because it acts as an incredible protective style for natural hair while looking deeply majestic. It keeps your hair tucked away safely while showcasing intricate scalp patterns.
Cleanly part your hair into four or five thick vertical tracks from front to back. Braid each section flat against the scalp using the underhand cornrow technique to create raised braids. Once all braids reach the crown or nape, gather the loose hanging ends together. Wrap these braided ends into a large, coiled bun and pin it down.
Pro-Tip: Lay down your baby hairs using a small toothbrush and some flaxseed gel to add a soft, detailed frame to the braided look.
This regal style radiates elegance, power, and heritage. It is incredibly functional for long vacations, busy weeks, or formal gala events where you want zero hair maintenance.
14. The Messy Bun with Thick Headband
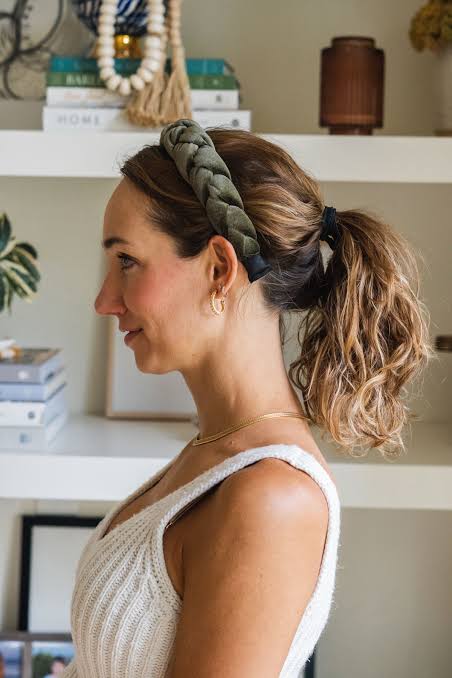
The messy bun with a thick headband is your ultimate secret weapon for hectic mornings or awkward hair growth stages. This design approach works by instantly concealing frizz, product buildup, or flat roots at the front of your head while highlighting a gorgeous explosion of curls at the back.
Pull your hair into a quick, loose bun at any height you like. Slide a wide fabric headband onto your head, pushing it back about an inch from your front hairline. This pushes your curls upward and forward, creating instant volume directly behind the band while smoothing your edges down perfectly without any heavy gel.
- Headband Choice: Look for breathable cotton or silk blends to prevent hairline friction.
- Volume Boost: Gently pull the bun upward after placing the band to restore fullness.
- Ease of Use: Takes less than two minutes to complete from start to finish.
This look creates a sporty, fresh, and highly functional atmosphere. It is perfect for running errands, working from home, or heading to a casual yoga class.
15. The Deep Side-Sweep Bun
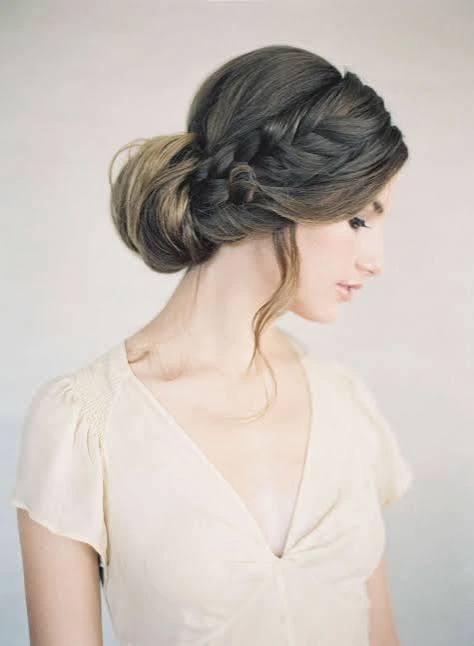
The deep side-sweep bun brings dramatic, old-Hollywood glamour straight to natural textures. This approach works by utilizing an extreme side part to drape a heavy canopy of curls across the forehead before securing them into a low, structured bun. It creates a gorgeous, asymmetrical curtain effect that looks incredibly high-end.
Create an extreme side part aligned with the outer tail of your eyebrow. Sweep the larger section of hair across your forehead, letting it graze your brow bone softly. Gather all of your hair into a low side bun behind the opposite ear. Secure it tightly so the dramatic sweep across the front stays smooth and taut.
[Extreme Side Part] ---> [Brow-Grazing Sweep] ---> [Secure Behind Opposite Ear]
This design creates an incredibly dramatic, sophisticated, and red-carpet-ready atmosphere. It solves the challenge of making curly hair look intensely formal and high-fashion for evening galas.
16. The Embellished Pearl Bun
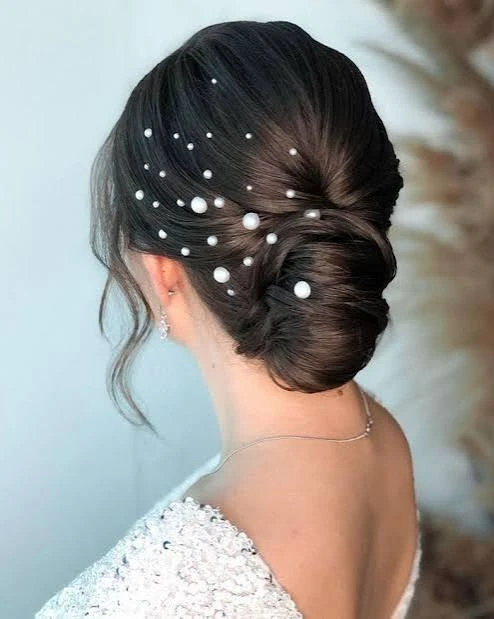
The embellished pearl bun elevates a standard curly updo into an ethereal piece of wearable art. This approach works because the smooth, iridescent texture of pearls creates a stunning contrast against the organic, wild texture of natural curls. It instantly signals luxury and celebration.
Style your hair into a neat, mid-height curly bun using your favorite method. Once secured, insert hairpins topped with flat-backed pearls directly into the body of the bun. Scatter them randomly like stars in the sky, or place them in a neat row directly circling the base of the updo for a cleaner look.
Pro-Tip: Make sure the pins fit snugly against your scalp so the weight of the pearl embellishments doesn’t cause the pin to slip out throughout the day.
This style creates a dreamy, luxurious, and celebratory atmosphere. It is arguably the most perfect look for modern brides, prom nights, or high-end holiday parties.
17. The Textured Shag Bun
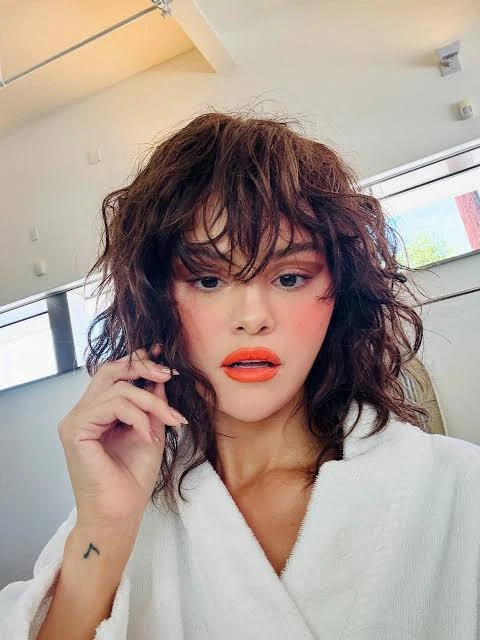
The textured shag bun embraces the messy, layered look of modern shag haircuts and turns those short, uneven layers into a styling benefit. This approach works because it does not try to hide the shorter pieces of hair; instead, it lets them erupt around the bun like a soft, feathery halo.
Gather your hair loosely at the crown and secure it into a basic bun loop. Allow your shorter face-framing layers, curtain bangs, and neck layers to drop out of the updo completely. Apply a tiny amount of lightweight curl mousse to these free-floating pieces and scrunch them to enhance their natural shape.
- Layer Management: Do not force short layers into the hair tie; let them fall naturally.
- Product Choice: Volumizing mousse keeps the loose layers looking airy instead of greasy.
- Overall Shape: Round, soft, and highly textured throughout the entire head.
This style delivers an effortless, rock-and-roll, modern creative vibe. It is perfect for casual daily wear, art students, or anyone rocking a modern shag or wolf cut.
Common Curly Styling Mistakes to Avoid
We see people make the same few mistakes over and over when trying to put their curls up. Let’s fix those right now so you don’t damage your hair!
- Using standard rubber bands: These bite into the hair shaft and cause horrific snapping and splitting. Always use seamless elastics, silk scrunchies, or hair bungees.
- Pulling the hairline too tight: Doing this repeatedly can cause traction alopecia (hair loss around your forehead). Keep your edges soft and comfortable.
- Styling while bone dry without product: Trying to manipulate dry curls creates instant frizz friction. Always mist your hair with a little water or leave-in conditioner first to give it elasticity.
- Overloading with heavy wax: Heavy waxes weigh down curls and make your bun look like a solid, greasy block. Stick to lightweight gels, mousses, and creams.
Smart Alternatives to a Basic Bun
If you want a similar look but want to mix things up slightly, try these beautiful variations:
The Curly Puff
Instead of looping your hair into a knot, you simply use an elastic band to hold the base, letting the ends bloom outward like a gorgeous pom-pom. This is exceptional for Type 4 hair.
The French Twist Roll
Instead of gathering hair into a round circle, you roll it vertically along the back of your head and pin it down. This gives an elongated, sleek appearance that looks highly classic.
The Banana Clip Updo
An absolute throwback that works flawlessly for curls. A long banana clip gathers your hair vertically, creating a cascading waterfall effect down the center of your head that mimics a faux-hawk without the pins.
Ultimate Curly Hair Care Routine
To make sure your curly bun hairstyles look absolutely phenomenal, your underlying hair health needs to be on point. Healthy curls create beautiful buns naturally.
- Hydrate Weekly: Curls are naturally dry because scalp oils can’t easily travel down the twists of the hair strand. Deep condition once a week without fail.
- Ditch the Cotton Towels: Regular towels rough up the hair cuticle, leading to massive frizz before you even start styling. Switch to a microfiber towel or an old cotton t-shirt to gently squeeze out excess water.
- Sleep on Silk: Cotton pillowcases suck the moisture right out of your hair and snag your curls while you toss and turn. Invest in a satin bonnet or a silk pillowcase to keep your curls smooth overnight.
- Clarify the Roots: Because updos often require edge controls and gels, product buildup happens quickly. Use a clarifying shampoo once every two weeks to clean your scalp down to the roots.
Taking care of your natural pattern makes creating these looks simple, fast, and incredibly rewarding. With these tools, tips, and designs in your arsenal, you can rock gorgeous curly bun hairstyles every single day with absolute confidence!